How to Stop Showing Adsense in Certain Pages in your Site
Today, I will teach you how to stop showing adsense in certain pages in your site. Adsense is a great way to monetize your site especially when you are a beginner. This works well if your site is already a highly trafficked site and your focus is your content instead of selling off something.
Years ago, installing adsense is manual and in most cases you will have to install the code either in each page of your site OR you will have to install it in header or footer before the closing tag so that it will appear in every site.
However, recently, Adsense made changes to this. When you install adsense, you will have to upload code at the root folder of your site. And the ads will automatically appear almost in every page of your site.
So the problem happens when ads appear in your sales pages, privacy policy page, and other pages where you want your visitors to just focus to do an action. So this tutorial will be for that purpose.
So here it is:
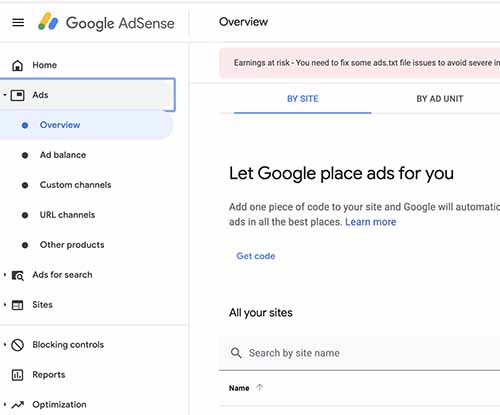
1. Login to your Adsense account.
2. Go to Ads>> Overview
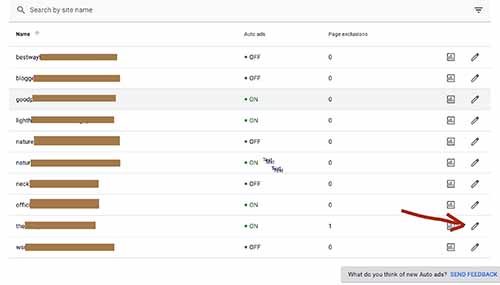
3. Select the site where you want to add page exclusion for the ads. Click the Pencil icon.
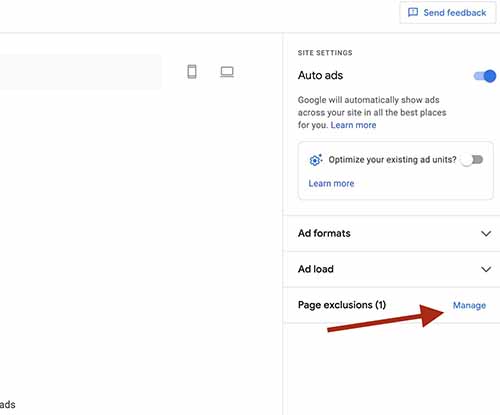
4. On the page that will appear, right hand bar, bottom, Click “Manage” in Page exclusion Section.
5. Add the link that you want to exclude from Adsense.
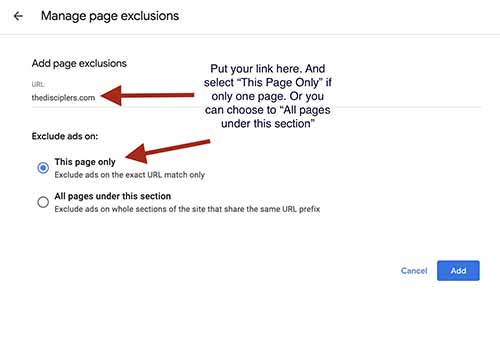
6. Click Apply to Site (lower right hand corner. This will appear after clicking the ad.
After putting the pages that you want to exclude from ads, just wait for a few minutes to see the effect and you should see that ads will no longer appear on that specific link.